Reloading is a precision craft, and like any craft, the quality of your workspace directly affects the quality of your output. A reloading bench built around your workflow — with the right surface, lighting, storage, and tool placement — turns every loading session into something efficient and enjoyable. Bolt a press to a wobbly folding table and you'll spend half your time correcting for movement and hunting for components you put down somewhere.
This guide is for the reloader ready to build or upgrade a dedicated bench. Whether you're setting up in a corner of the garage or building out a room, these principles scale to any space and budget.
Location and Space Requirements
Before you build anything, choose your location carefully. Reloading requires:
- Temperature stability: Extreme heat affects powder performance and primer sensitivity. A climate-controlled space is ideal; at minimum, avoid a space that bakes in summer or freezes in winter.
- Ventilation: Primers contain lead styphnate and other compounds. Adequate ventilation — a window, exhaust fan, or both — is important for any volume shooting.
- Dedicated space: Reloading interrupted by people, pets, or distractions creates conditions for mistakes. A room or dedicated bench area with a door you can close is worth the extra square footage.
- Lighting: Bright, shadow-free lighting is non-negotiable. You need to see case mouths, primer pockets, and powder charges clearly.
Building the Bench
Surface Height and Depth
The ideal reloading bench height is 36 to 38 inches for most adults — slightly higher than a kitchen counter. This keeps you from hunching over a press handle for hours. If you reload standing, add another 2 to 4 inches. Bench depth should be at least 24 inches; 30 inches is better, giving you room for a press at the front edge, a scale and powder measure in the middle zone, and reference materials at the back.
Bench Construction
A reloading bench needs to be rigid. Press operation puts significant downward and lateral force on the mounting surface, and flex in the bench transfers directly into inconsistent sizing and seating. The simplest proven design:
- 2x6 or 2x8 lumber for the frame, secured to wall studs
- Two layers of ¾-inch plywood glued and screwed for the work surface (this creates a 1.5-inch thick, extremely solid top)
- Legs anchored to the floor with L-brackets for additional stability if the bench isn't wall-mounted
A bench mounted directly to the wall studs on one side and supported by legs on the other is more stable than a freestanding bench of any construction. If your space allows it, mount to the wall.
Surface Covering
Cover the bench top with a non-slip, easy-to-clean surface. Linoleum sheet is inexpensive and durable. Many reloaders use a rubber mat in front of the press — it catches dropped primers and cases, dampens vibration, and is easy to replace. Avoid carpet, which traps primer residue and is difficult to keep clean.
Press Placement and Mounting
Mount your primary press at the left or right edge of the bench, positioned so your operating arm has a full, unobstructed stroke. Most standard C-frame and O-frame presses need at least 14 to 16 inches of clearance above the top of the press for full ram travel — measure before you plan overhead shelving.
If you run a progressive press, mount it on a dedicated, isolated section of bench — vibration from progressive operation can knock scales and disturb sensitive tools nearby. Some reloaders mount the progressive on a separate standalone bench entirely.
Bolt the press directly through the bench top into a backing block on the underside. Use grade-5 or better hardware and large fender washers on both sides to distribute load. A press that moves under operation costs you consistency every single time.
Essential Tools and Their Placement
The Scale Zone
Your powder scale — whether a beam scale or electronic — needs to be placed away from vibration and airflow. Position it 12 to 18 inches from the press and away from any HVAC vents, open windows, or fans. Even small air currents cause electronic scale readings to fluctuate. A small foam pad under the scale damps bench vibration. If you use a powder trickler, keep it immediately adjacent to the scale so you're not moving the pan across the bench.
Case Prep Tools
Case prep — trimming, deburring, primer pocket cleaning — is best done in a defined zone with a catch tray to contain brass. Position your case trimmer (whether manual, electric, or lathe-style) at the far end of the bench from your powder measure. Brass shavings and powder are a combination you don't want near each other.
Component Storage
Keep currently-loaded components within arm's reach and store everything else in labeled bins, cabinets, or shelving. The working area should have:
- One or two powder canisters for active use, labeled clearly
- A divided parts tray or block for bullets, primers, and cases in use
- Die box for the current caliber being loaded
Everything else — reserve powder jugs, excess primers, bulk brass — stores in locked cabinets below the bench or on shelving above. Never have multiple powder types open on the bench at the same time. This is how double-charges and wrong-powder mistakes happen.
Lighting
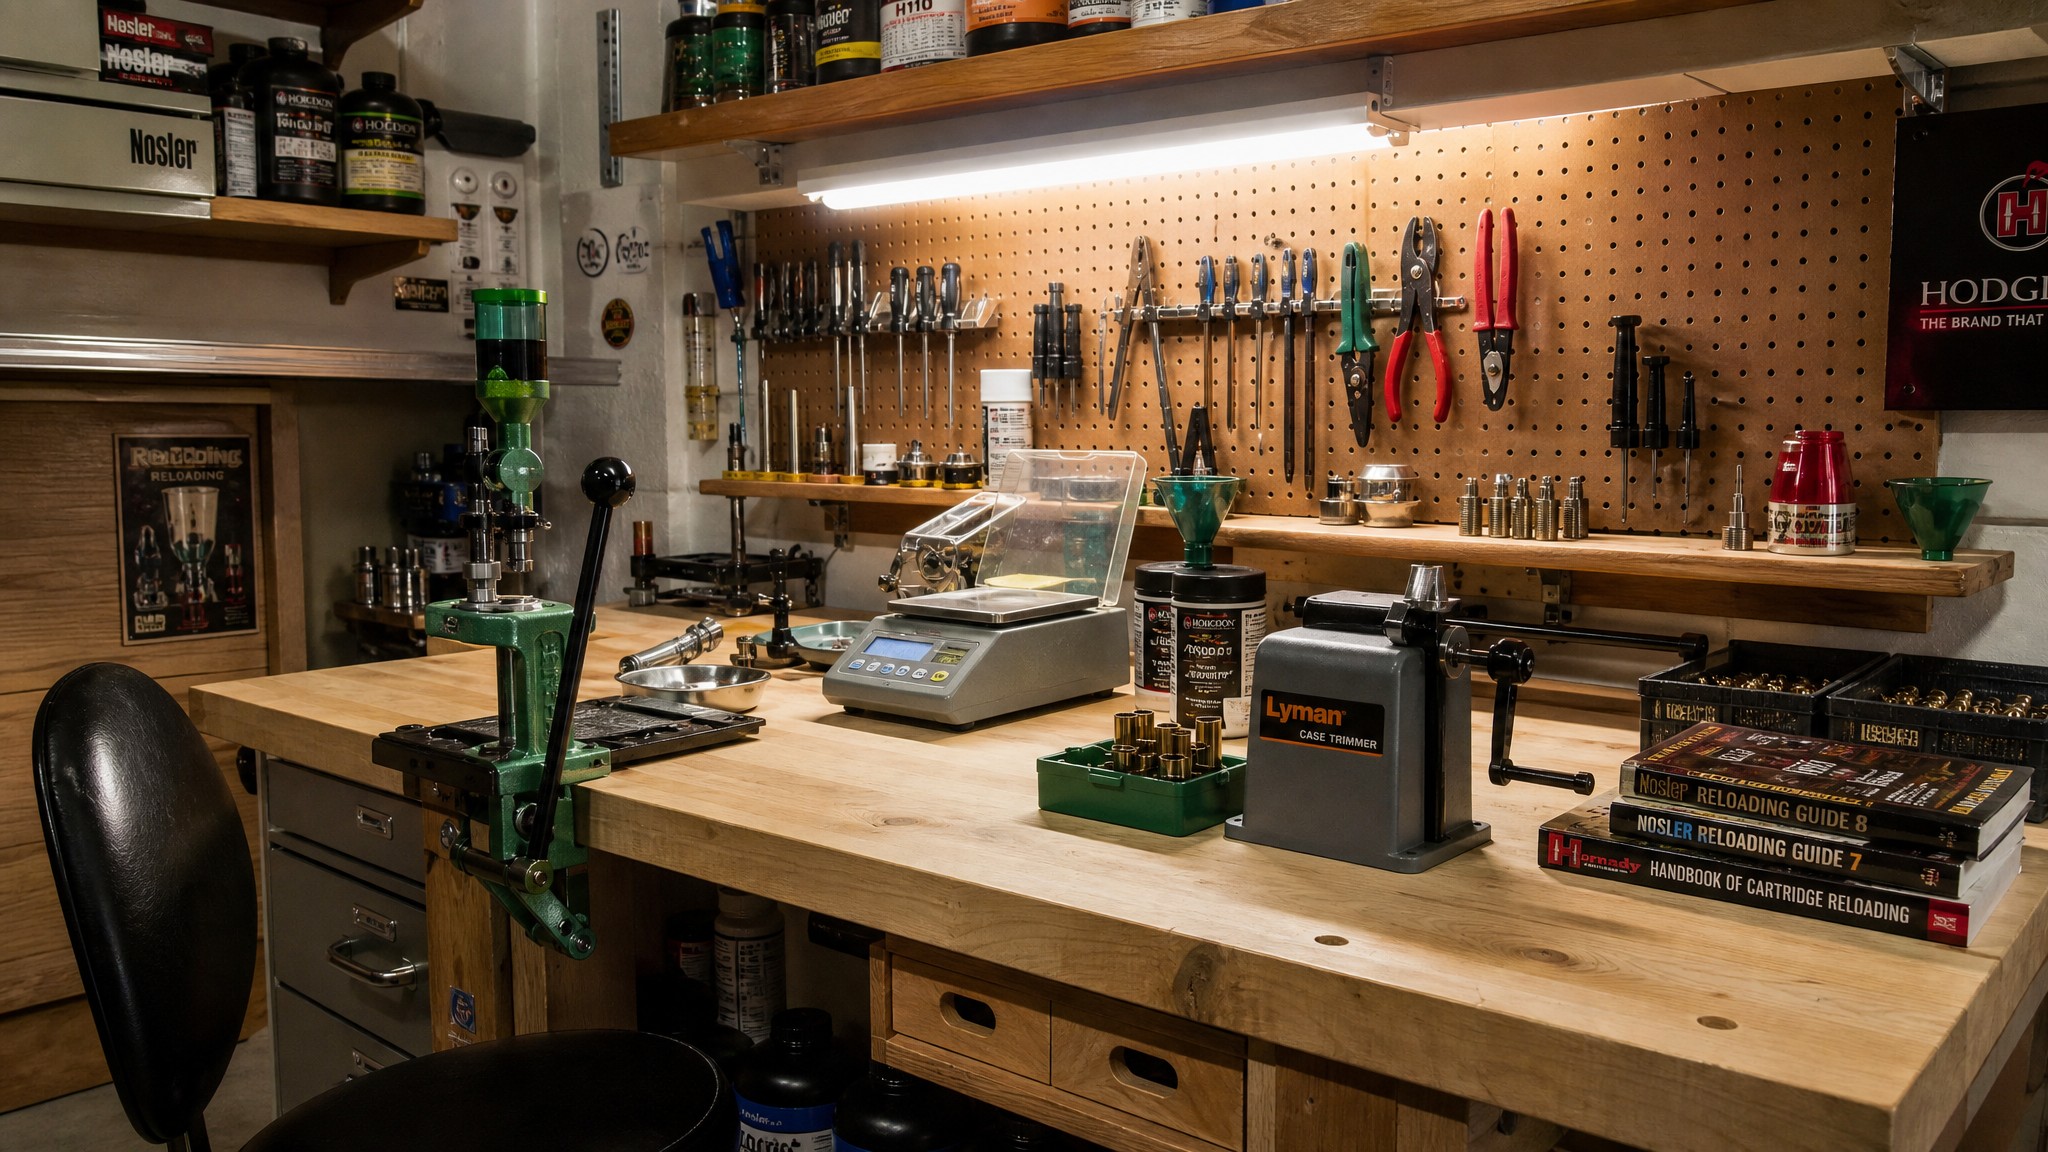
Overhead fluorescent or LED shop lights provide ambient illumination. Add a dedicated task light positioned to illuminate the press ram area — this is where you need to see powder levels in cases, primer seating depth, and bullet seating. An articulating LED arm lamp works well. Position it so it doesn't create shadows across the case mouth when you're checking charges.
Some reloaders add under-shelf LED strip lighting to illuminate the main work surface from above at a low angle. This makes primer pocket inspection, case mouth condition, and powder charge visual checks much easier.
Organization Systems That Actually Work
Label everything. Every storage bin, every drawer, every shelf. Powder containers should have the powder name and lot number written in permanent marker on tape. Die boxes should list the caliber and last die settings on a sticky note inside the lid. Current project materials — brass, bullets, primers for one specific load — stay in a dedicated labeled box that moves as a unit.
Hang a pegboard section above or beside the bench for frequently used hand tools: case lube, primer tools, calipers, tricklers. Tools hanging in plain sight get used; tools buried in drawers get forgotten.
Safety Essentials
Keep a fire extinguisher in the reloading room. Smokeless powder is a flammable material. Store primers in their original factory packaging, not in bulk containers. Don't smoke in the reloading room. And always — always — account for every charge. A single unchecked case can ruin a barrel, a bench, and your day.
A dedicated reloading bench is an investment you'll use for decades. Build it right once, and every loading session after that pays dividends in consistency, speed, and the genuine pleasure of working in a space designed for the job.