You killed a bull elk. Congratulations. Now the real work starts, and if you're alone, you need to have thought this through before that arrow flew or that trigger broke. Packing out an elk solo is one of the most physically demanding tasks in North American hunting, but it's done regularly by fit, prepared hunters who planned ahead. Here's how to do it right.
Before You Shoot: The Mental Contract
Solo backcountry elk hunting requires a pre-shot commitment. Before you take an animal, you need to honestly answer: can I recover this elk by myself from this location? Factor in the terrain, your physical condition, distance to the trailhead, ambient temperature, and how much daylight you have. Shooting a bull at last light in a steep canyon two miles from the truck in August heat is a very different proposition than a meadow kill at noon in September with three hours of mild weather.
If the situation is marginal, wait for a better shot opportunity or a better position. There's no shame in letting a bull walk when the logistics don't add up. There's plenty of shame in wasting a bull because you bit off more than you could chew.
Field Dressing and Quartering
Once the animal is down, work fast. The clock starts immediately—bacteria multiply quickly in warm muscle tissue. Your goal is to get the meat cooled as fast as possible.
For a solo recovery, the gutless method is almost always superior to traditional field dressing. You don't need to roll a 700-pound bull or work inside the body cavity. Here's the sequence:
- Position the bull: Work with gravity. If possible, get the elk on level ground or with the uphill side accessible. You'll quarter off the uphill side first.
- Skin and cape as you go: Pull the hide back as you work each side. This acts as a clean tarp for the meat and keeps it off the ground.
- Remove the four quarters: Front shoulders come off clean without opening the body cavity. Hindquarters require cutting around the hip socket or disjointing it. A quality folding saw handles bone when needed.
- Remove the backstraps and tenderloins: Run your knife along the spine for the backstraps. The tenderloins are inside the body cavity on either side of the spine—worth the extra minute to retrieve them.
- Neck meat and brisket: Don't leave this behind. Pack it in game bags and carry it out. It's excellent burger meat.
Meat Care in the Field
Quality game bags are non-negotiable. Cheap mesh bags let flies access the meat; lightweight woven bags like those from Caribou Gear or Alaska Game Bags seal out insects while allowing airflow. You'll need at minimum four large bags for the quarters, plus additional bags for the loins and trim.
Hang quarters off the ground in a shaded area with good airflow if you can't move them immediately. Avoid piling quarters together—they need to breathe. In temperatures above 50°F, you're working against time. In cool September mornings in the Oregon high country, you have more margin.
Salt the meat lightly on cut surfaces if you're concerned about conditions and can't get it out fast. A light coat forms a protective crust and slows bacterial growth.
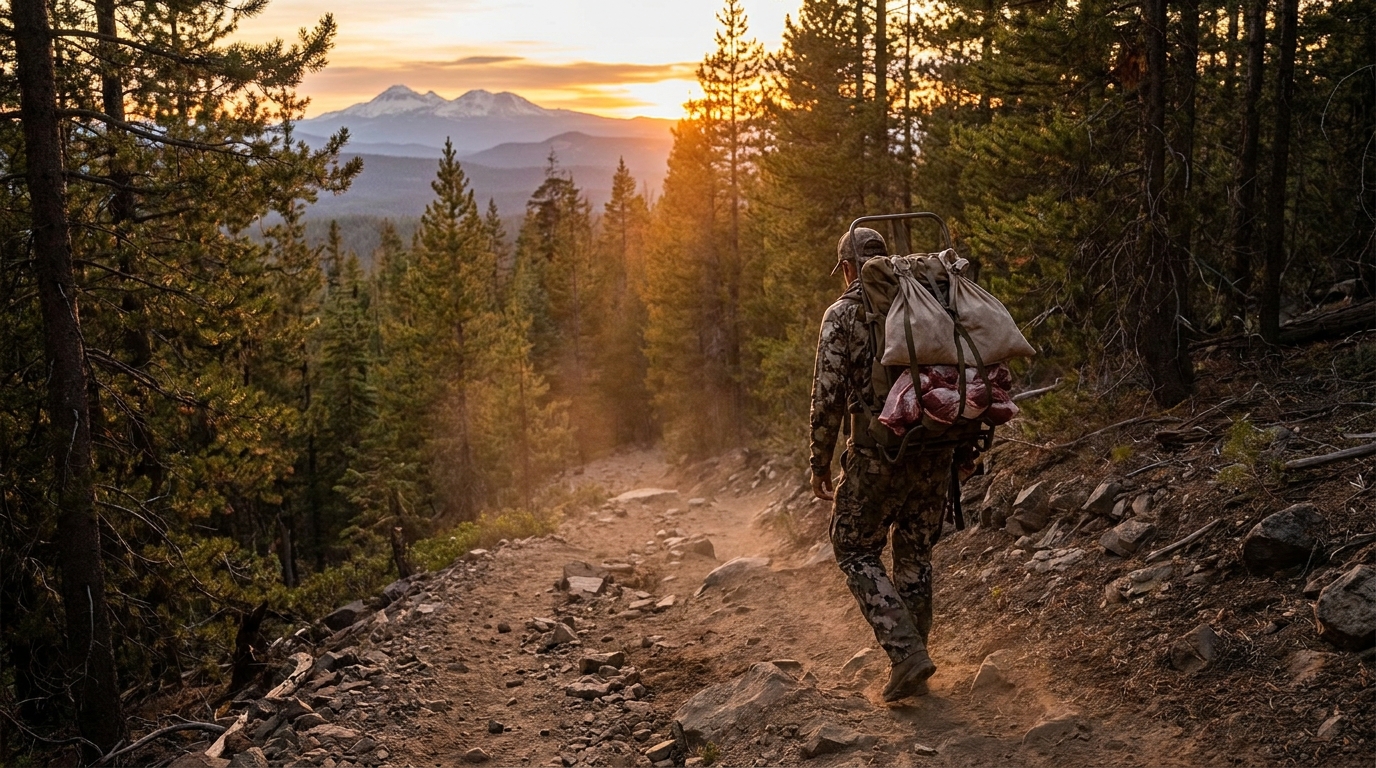
Pack Systems for Solo Recovery
Your pack system determines how many trips you'll make—and how destroyed you'll be at the end. For solo elk recovery, the serious options are:
- Large external frame packs (6,000–8,000 cubic inches): The workhorses of elk recovery. Mystery Ranch NICE frame, Kifaru frames, and aluminum DIY frames all work. The ability to lash a quarter directly to the frame is essential. Front and rear quarters of an elk typically run 80–130 lbs each.
- Meat hauler inserts: Some hunters use a dedicated meat hauler like the Stone Glacier EVO 6900 or Exo Mountain Gear K3 4800 that's designed to carry heavy loads and also serve as a hunting pack. Dual-purpose keeps your kit weight down on the approach.
- Game carts: On trails or gentle terrain, a folding game cart can dramatically reduce trips. They're useless in steep, rocky, or downed-timber country but are a legitimate tool in the right environment.
Logistics: Making the Math Work
A mature Oregon bull elk will yield 200–350 lbs of boned-out meat. Quartered with bone-in, you're moving significantly more weight. Plan your trips:
- Trip 1: Two hindquarters (heaviest load—get these out first)
- Trip 2: Both front shoulders, backstraps, and tenderloins
- Trip 3: Neck meat, trim, cape, and antlers if you're packing them out
Mark your kill site with a GPS waypoint before you leave with the first load. Brush, terrain, and darkness will make that site harder to find than you think on the return trip. Cache the remaining quarters in the shade, elevated if possible.
Tell someone exactly where you are before you go. A written kill site description with GPS coordinates left with a partner or at your truck is your insurance policy. Solo elk recovery has left hunters in serious trouble when a twisted ankle or exhaustion hits five miles from the trailhead with 80 lbs on their back.
Physical Preparation
Packing out an elk solo is essentially loaded hiking with weight at the extreme end of what most people will ever carry. A summer of pack training—hiking with progressively heavier loads on real terrain—is the single best investment you can make. Start with 40 lbs in June and work up to 80+ lbs on steep trails by September. Your knees, hips, and cardiovascular system will thank you, and more importantly, you'll actually enjoy the recovery instead of surviving it.
Final Check: The Solo Hunter's Kit
- 4–6 quality game bags (extra-large)
- Sharp folding saw and two sharp knives with a sharpener
- Nitrile gloves (several pairs)
- Lightweight tarp or additional elk hide for meat staging
- Headlamp with extra batteries
- GPS with kill site marked pre-shot
- Emergency bivy or emergency blanket
- Communication device (satellite communicator if out of cell range)
The bull you kill solo and pack out yourself will be the one you remember the longest. It's harder, lonelier, and more demanding than hunting with partners—and it's also the most honest measure of what you're capable of in the field.