There's a satisfaction that comes from pulling the trigger on a rifle you assembled yourself that doesn't come from pulling one off the gun store shelf. Building your own AR-15 lower receiver is an achievable project for any shooter with basic mechanical aptitude, the right tools, and an afternoon to spare. The parts fit together like a mechanical puzzle, and when you're done, you understand the rifle in a way that no amount of shooting alone can teach you.
This guide covers the process of building a stripped lower receiver into a complete lower, Oregon and Washington-specific legal considerations, and the tools and parts you'll need to get it right the first time.
Oregon Legal Considerations First
Before you buy a single part, understand the legal landscape. Oregon has magazine capacity restrictions and other regulations that affect AR platform builds. Verify current law—including Measure 114 developments and any ATF rulings—with an Oregon firearms attorney or a reliable source like the Oregon Firearms Federation before building. Building a lower for personal use (not for sale or transfer) is legal federally and in Oregon, provided you are legally allowed to own firearms. Serialization of personally manufactured firearms is required by current ATF regulations—use a licensed engraver or a jig-compatible serialization service. Never build with intent to sell or transfer without an FFL.
Parts You'll Need
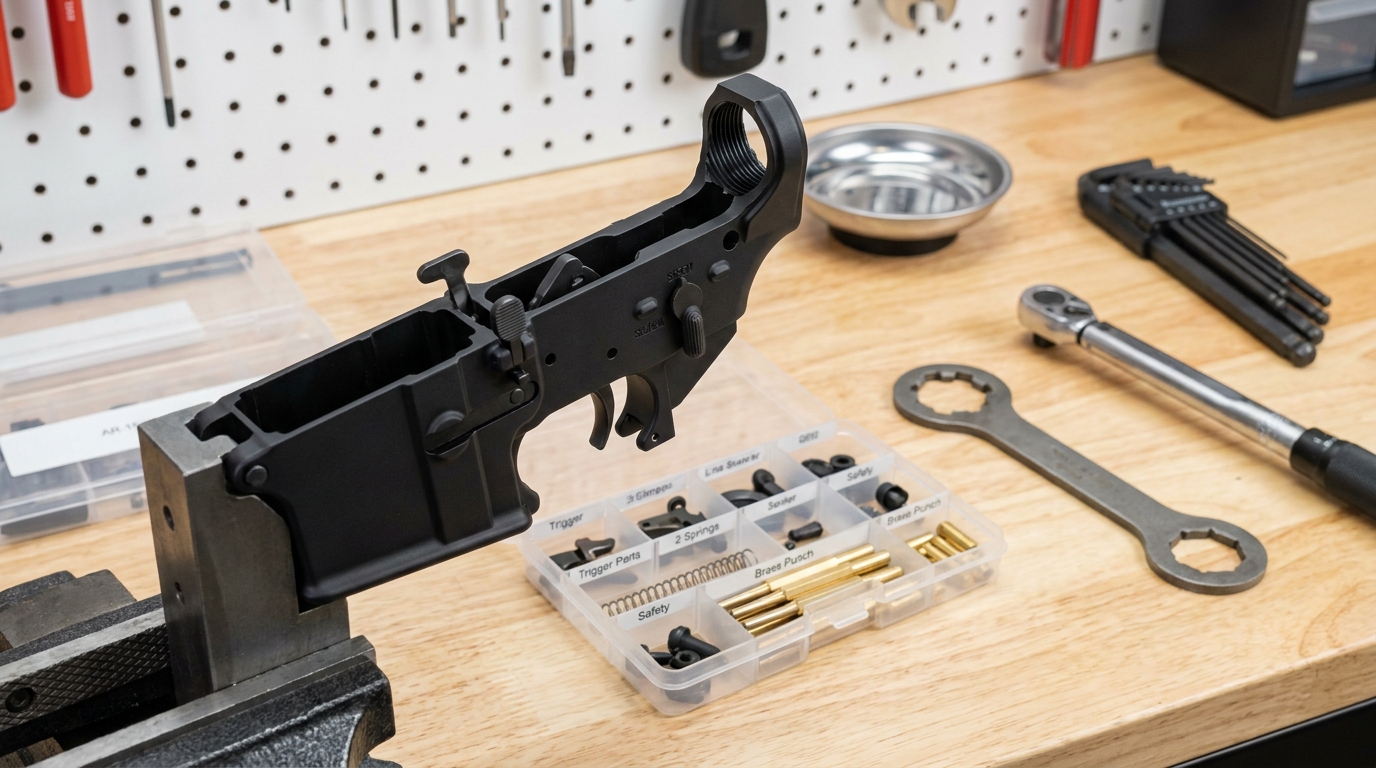
A complete lower requires a stripped lower receiver and a lower parts kit (LPK). The LPK contains everything else:
- Trigger, hammer, disconnector, and associated springs
- Safety selector
- Pistol grip
- Bolt catch, plunger, spring, and roll pin
- Magazine catch, button, and spring
- Takedown and pivot pins with detents and springs
- Buffer tube, buffer, and buffer spring
- Buttstock
Quality LPKs from CMMG, Aero Precision, BCM, or Palmetto State Armory cover the basics reliably. For a hunting or precision build, consider upgrading the trigger group separately—a 3.5 to 4.5 lb single-stage trigger from Geissele, LaRue, or CMC makes a genuine difference in field accuracy.
Tools Required
- Armorer's block: Holds the lower securely without scratching the finish. Non-negotiable.
- Punch set: Steel punches in 3/32" and 1/8" for driving pins.
- Hammer: A rubber or brass mallet.
- Roll pin punch set: Specifically for the trigger guard roll pin.
- Needle-nose pliers: For seating springs.
- Torque wrench: For buffer tube installation (35–40 ft-lbs).
- Castle nut wrench: For tightening and staking the castle nut.
Step-by-Step Assembly
1. Install the Trigger Guard
The trigger guard roll pin is the step most builders dread. It's easy to crack lower receivers here if you rush. Use a quality roll pin punch, support the receiver on your armorer's block, and drive the pin in straight. Slow is smooth. Cracked trigger guard ears mean a ruined lower.
2. Install the Magazine Catch
Insert the magazine release from the right side of the lower. Hold the button depressed from the left while threading so the spring loads correctly. The catch should click positively into the mag well and release cleanly on each press.
3. Install the Bolt Catch
Insert the bolt catch spring and plunger into the lower, position the bolt catch on the left side, and drive the roll pin through from left to right. Support the receiver firmly—this pin can also crack thin-walled receivers if driven at an angle.
4. Install the Trigger Group
This is the heart of the lower. Install the disconnector onto the trigger, add the disconnector spring, and lower the assembly into the trigger pocket. Drive in the trigger pin from right to left. Install the hammer with its spring—the spring legs wrap forward over the trigger pin. Drive the hammer pin. Test function: trigger should reset cleanly with hold-and-release, and the hammer should be caught by the disconnector before resetting forward.
5. Install the Safety Selector
Insert the selector from the left side of the lower, seating the detent and spring in the pistol grip channel. Install the pistol grip with the spring and detent aligned in the lower's channel. Don't overtighten the grip screw—you're threading into aluminum or polymer, and stripped threads mean a ruined lower.
6. Install Takedown and Pivot Pins
These pins join the upper and lower receivers. The detent and spring for the rear pin are retained by the buffer tube; the front detent is retained by the upper receiver when the rifle is assembled. Install the rear pin detent and spring now, seated in the buffer tube channel, but don't drive the pin fully until the buffer tube is torqued.
7. Install the Buffer Tube Assembly
Thread the castle nut onto the buffer tube, followed by the end plate—align the rear takedown detent channel in the end plate with the detent spring in the lower. Thread the assembly into the lower, then torque to 35–40 ft-lbs. Stake the castle nut in at least two places with a center punch to prevent backing off under recoil. This step is not optional. Un-staked castle nuts back off and cause malfunctions.
8. Install Stock and Buffer
Slide your stock onto the buffer tube. Install the buffer spring and buffer into the tube, verify the buffer retainer is seated and the buffer depresses it cleanly, and you're done with the lower assembly.
Final Function Check
Before pairing with an upper, run through a complete function check:
- Safety blocks the trigger in SAFE position
- Trigger breaks cleanly in FIRE position and resets fully
- Hammer follows the bolt carrier without slamming (disconnector functioning)
- Bolt catch engages and releases correctly
- Magazine drops free cleanly
A quality home-built lower, assembled carefully with good components, is every bit as reliable as anything you'll buy off the shelf—and you'll understand exactly what's inside it when something eventually needs service. That knowledge alone is worth the project.